

Publish your first customer gallery
Show shoppers your products in customers’ lives
Create a place to see how customers wear, style, or use your products. Start with one gallery on your homepage or a dedicated Customer Photos page.
You’ll collect photos, choose what to feature, and check the finished gallery on your storefront. You can make the photos shoppable by tagging products on Advanced or Premium.
Here for product-page photos? Jump to the product gallery instructions.
Before you begin
Install Socialphotos from the Shopify App Store and select a paid plan to start your 7-day trial. Already installed? Open Socialphotos in your Shopify admin.
- Basic: customer photo galleries on your homepage or other store pages.
- Advanced: also includes shoppable photos and product-page galleries.
- Premium: also includes video display and removal of Socialphotos branding.
Upload Pages is included on all three plans. Manage your subscription in Settings → Billing.
1. Choose where shoppers will see the photos
Pick one place for your first gallery:
- Homepage: introduce visitors to your customers and how they use your products.
- Customer Photos page: give shoppers a lookbook they can browse. You could name it “Styled by You” or “Our Community.”
- Product page: show photos of the specific product someone is considering. Follow the product gallery route below.
For a homepage or Customer Photos page, open Display → Galleries → Page in Socialphotos. Use your Starter Gallery if one is available, or click Add New Gallery and give it a name you’ll recognize.
2. Bring in customer photos
Choose the source that matches what you have today. You don’t need to connect Instagram to use uploads.
Customers already share photos on Instagram
Connect your account in Settings → Instagram, then review available posts, tags, mentions, or tracked hashtags. What can be retrieved depends on Instagram’s permissions and content availability.
Follow the Instagram connection guide.
You already have customer photos saved
Open Bulk Uploads and upload the files. This also works for content you’re moving from another gallery tool.
You need to ask customers for photos
- Open Upload Pages and click Create page.
- Name the page, then use Preview and Copy link in Manage pages.
- Share the link in a follow-up email or direct message inviting customers to show your product in use.
- Return to Upload Pages to review submissions. Customers do not need to sign in.
Follow the Upload Pages guide.
You can also collect photos through a gallery’s upload button. Those submissions appear in Customer Uploads. See storefront upload instructions.
3. Choose what to feature
Choose photos that help shoppers see your products in use: an outfit being worn, a room styled by a customer, or equipment on a trip.
- Find a photo in your chosen source: Instagram, Bulk Uploads, Upload Pages, or Customer Uploads.
- Click Add To Gallery and select the gallery you created.
- Repeat for the photos you want shoppers to see.
Receiving an upload does not publish it automatically. Add To Gallery saves a curated copy and places it in your selected gallery. Product tags are optional for a page gallery.
4. Publish your gallery
Open your gallery in Display → Galleries → Page and click Install Code to find its gallery ID. In Shopify’s theme editor, open the homepage or the page template where you want the gallery to appear.
For a dedicated Customer Photos page, create the page in Shopify first and select its assigned template. Changes to a shared template can appear on other pages that use it.
- Add the UGC Page Gallery app section or block where your theme supports it.
- Enter your gallery’s ID in the Gallery ID field.
- Save the theme changes.
Choose the layout and appearance
Back in Socialphotos, open the gallery and click Customize. Choose Vertical Grid for browsing down the page, Horizontal Carousel for browsing left and right through one or more rows, or Portrait Carousel for one row of tall cards.
All three support photos. Videos require Premium; Portrait Carousel also has a merchant-controlled Autoplay Videos setting. Adjust spacing, headings, and upload options, then Save. Your selected content and gallery ID stay the same. See all customization options.
Show installation walkthroughs for your theme
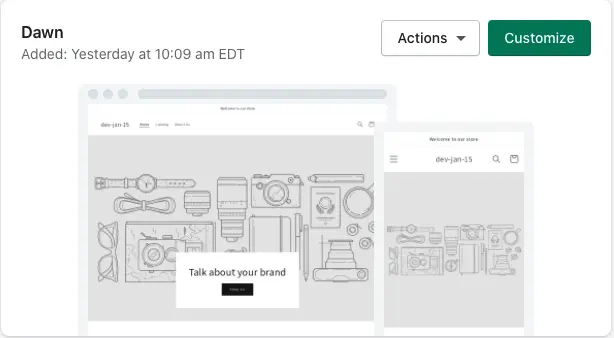
- Go to your Shopify Admin Themes page
- Click on Customize to start the Theme Editor
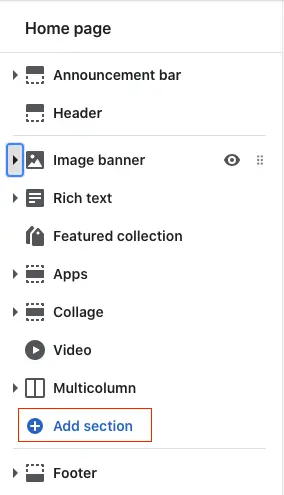
- Scroll down until you see the Add Section and click on it
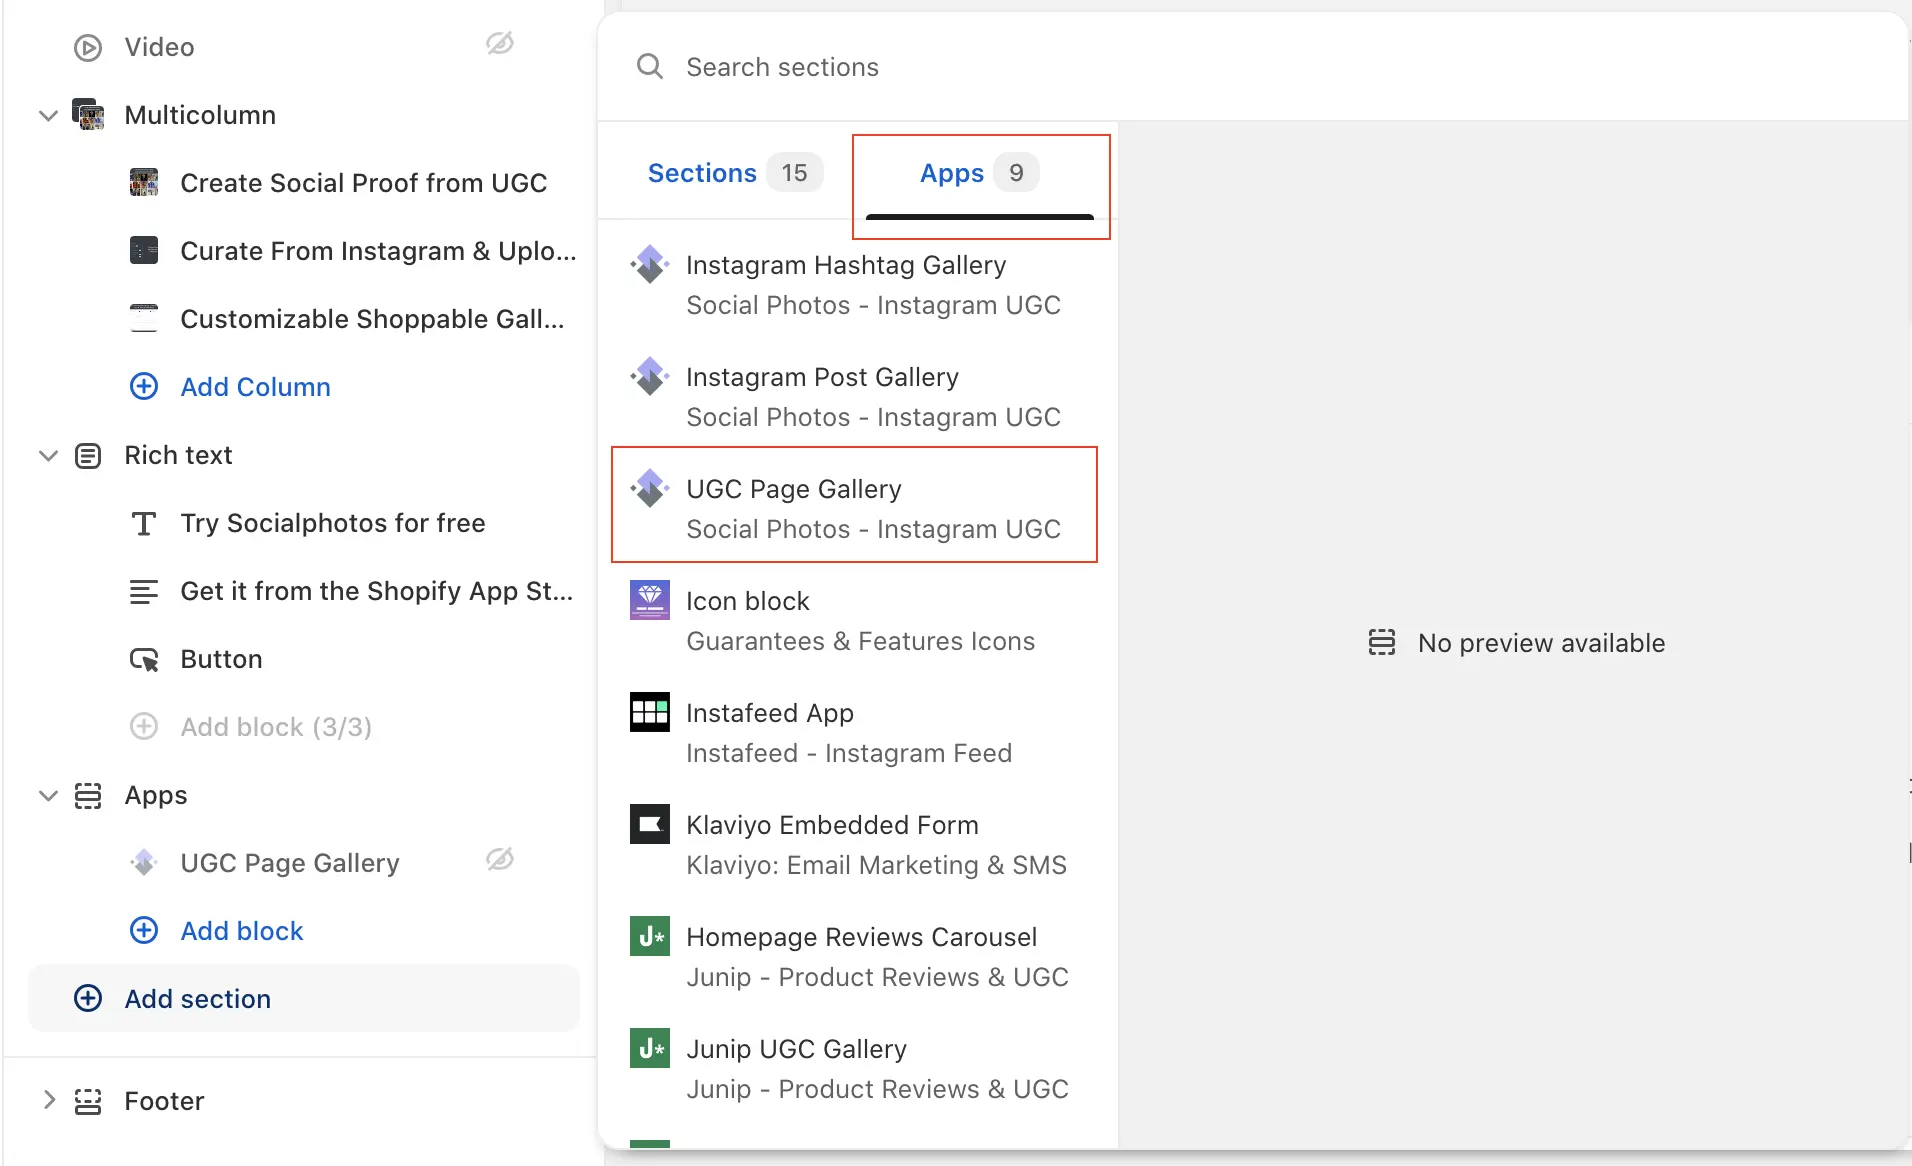
- Click on the Apps tab.
- Click on UGC Page Gallery
- The UGC Page Gallery is installed, but we need to specify the gallery ID.
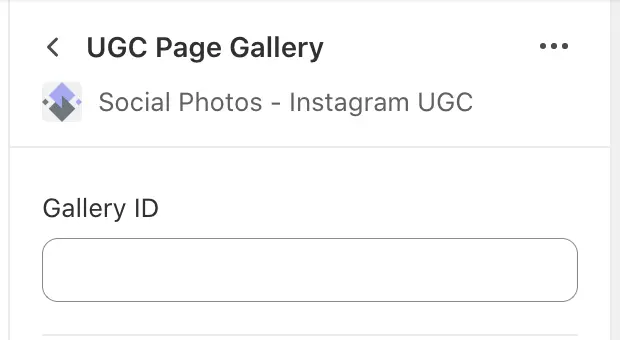
- Click on UGC Page Gallery that you have just installed.
- Enter Gallery ID into the Gallery ID field
- Click Save
- Check it on your website.

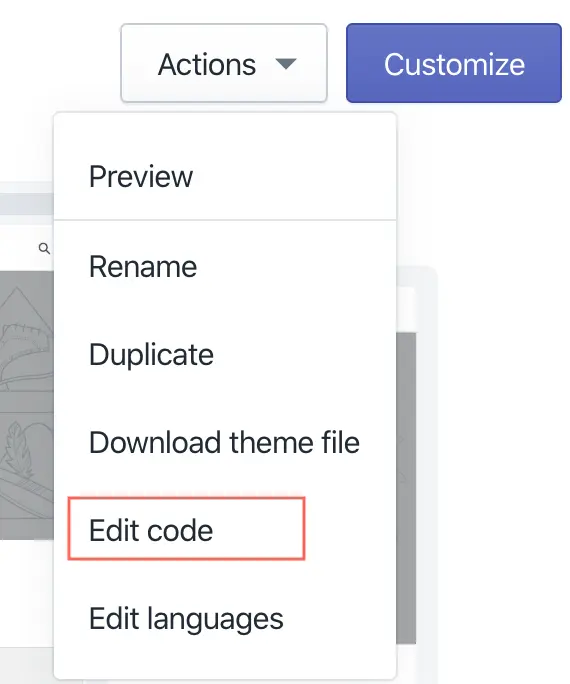
- Go to your Shopify Admin Themes Page.
-
Click on Actions and Edit Code
-
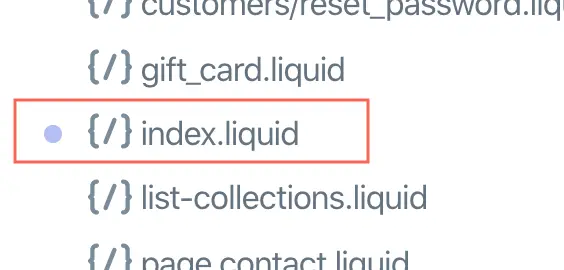
In the Templates section, click on index.liquid
-
Copy the following code:
<div class="socialphotos-com-gallery slpht-clearfix" data-id="Gallery ID"></div> -
Paste the code at the bottom of the index.liquid page.
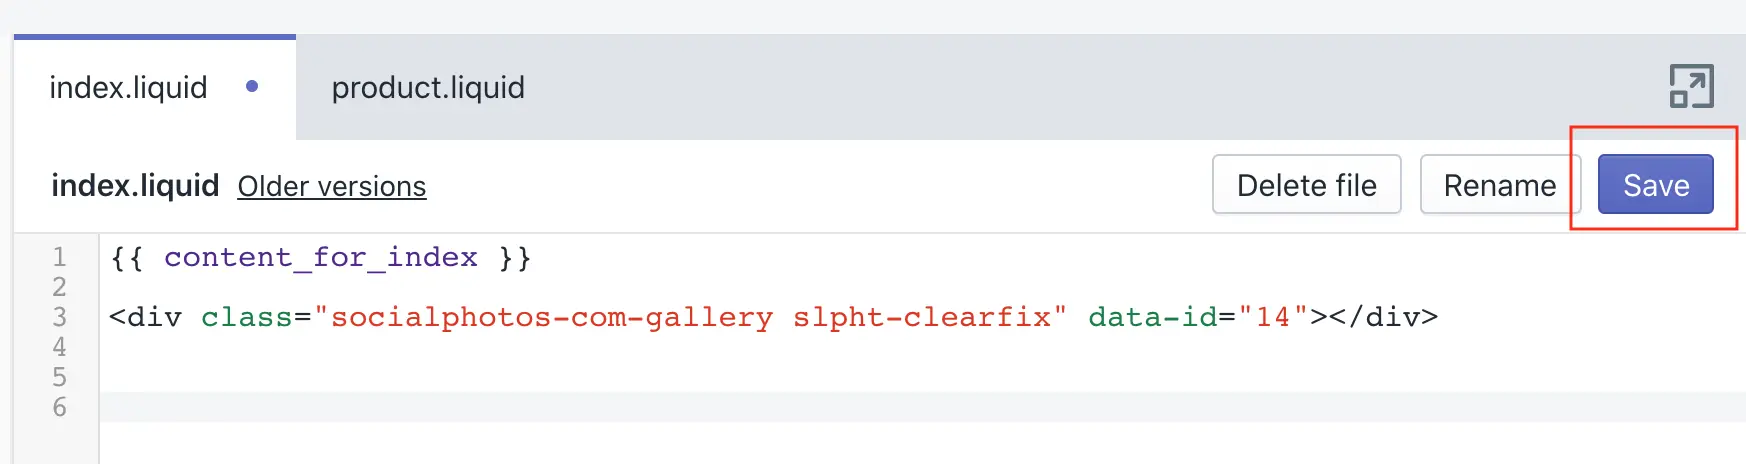
- Click Save
- Check it on your website.
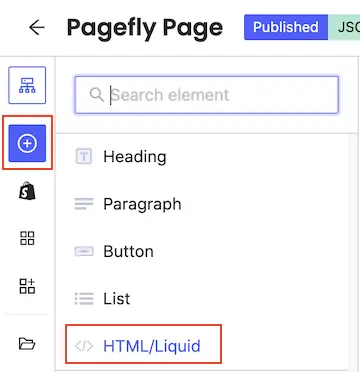
- Start on your Page Builder's theme editor.
- Click on Add Section and select HTML/Liquid.
- Click Open Code Editor
-
Copy the following code:
<div class="socialphotos-com-gallery slpht-clearfix" data-id="Gallery ID"></div> - Enter the code for your gallery
- Click Save & Close
- Save your changes and publish
- Check it on your website.


If you don't see your Page Gallery, contact us for help.
5. Check the shopper experience
- Open the storefront page and confirm your selected photos appear.
- Open a photo and check that it displays as expected.
- Check the gallery on your phone as well as desktop. For Portrait Carousel, check horizontal navigation and your chosen video autoplay behavior.
- If you created a Customer Photos page, add a link to it in your store navigation so shoppers can find it.
Your first gallery is ready when shoppers can open the page and browse your selected photos.
The gallery is empty or missing
- Confirm photos were added to this gallery, rather than left only in their source.
- Check that the app block uses the same gallery ID.
- Confirm you saved the changes to the theme and template you’re viewing.
- Contact support with the store page URL and what you expected to see.
Make photos shoppable
Advanced and Premium. Use Tag Product on a photo and select the product shown. Shoppers can then open the photo in a gallery, see its tagged products, and visit a product page.
Tagging also connects the photo to that product’s gallery. To show those photos on product pages, install the UGC Product Gallery below.
Set up photos on product pages
Advanced and Premium. Choose this route when you want a shopper to see customer photos of the product they’re viewing. You can start here without creating a page gallery.
Product Galleries offer the same three layouts through Galleries → Products → Customize. Their shared template styles your product galleries; each product still displays its own assigned content.
Tag photos, then install the product gallery
- Bring in your customer photos.
- On each photo, click Tag Product and select the matching product.
- In Shopify’s theme editor, open the product template you use and add UGC Product Gallery.
- Save, then visit a tagged product’s page to check its photos. Repeat for other product templates you use.
Each product page displays photos tagged to that product. A page without tagged photos will not have customer content to show.
Show product gallery installation walkthroughs
- Go to your Shopify Admin Themes
- Click on Customize to start the Theme Editor
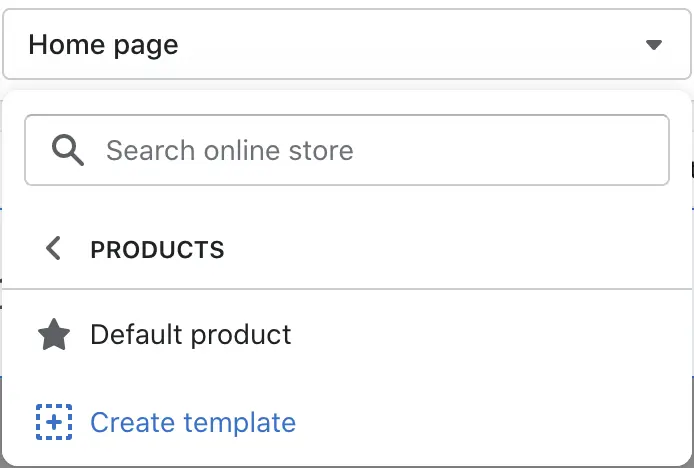
- Click on Home page → Products → Default Product
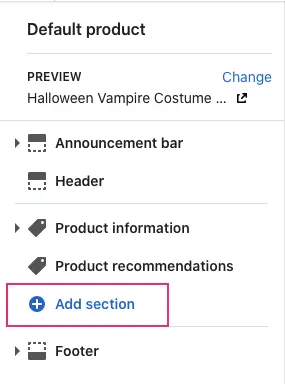
- On the product template's page, scroll down the left navigation until you see Add Section and click on it
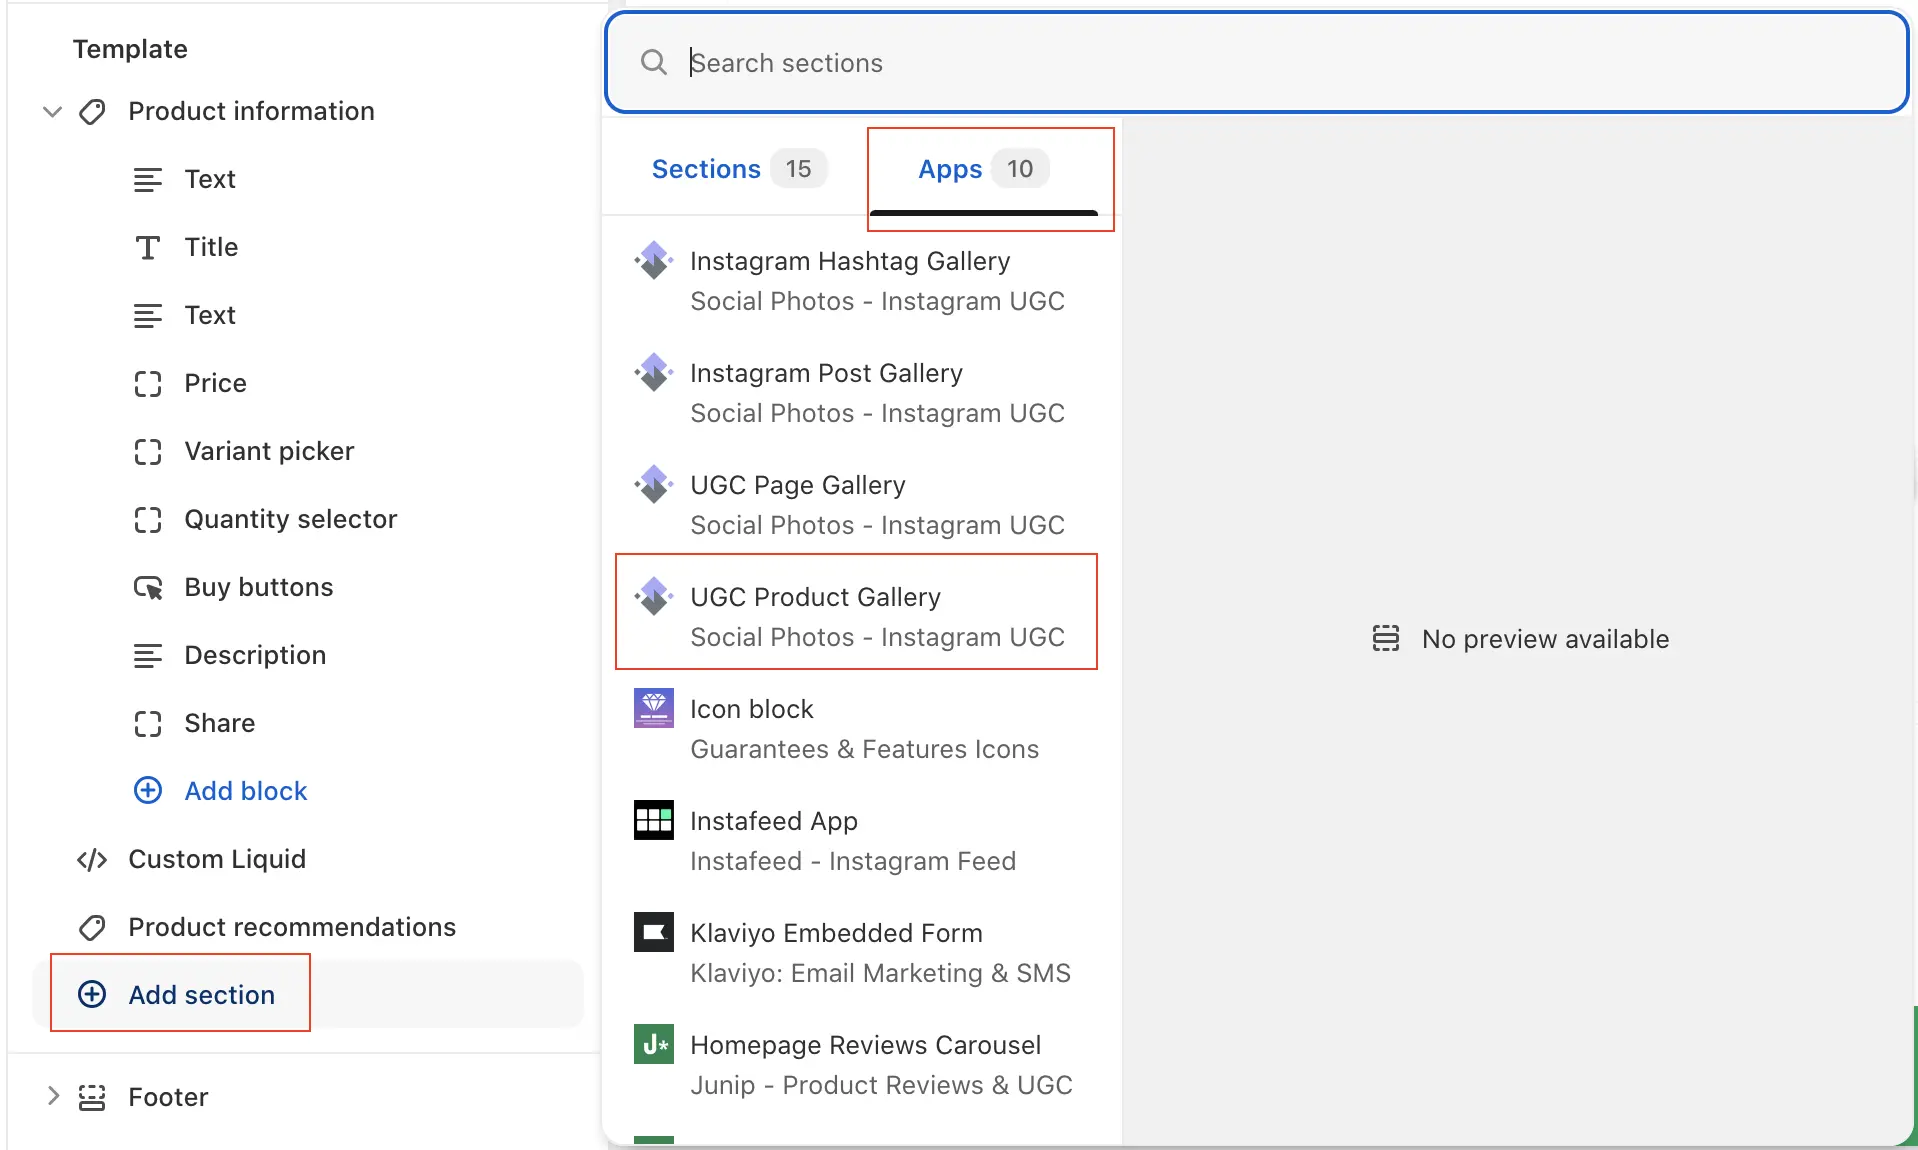
- Click on Apps .
- Click on UGC Product Gallery.
- Click Save
- Check it on your website.
- Go to your Shopify Admin Themes Page.
-
Click on Actions and Edit Code
-
In the Templates section, click on product.liquid

-
Copy the following code:
<div class="socialphotos-com-gallery slpht-clearfix" data-uid="shopify-domain.myshopify.com"></div> -
Paste the code at the bottom of the product.liquid page.

- Click Save
- Check it on your website.
- Start on your Page Builder's theme editor.
- Click on Add Section and select HTML/Liquid.
- Click Open Code Editor
-
Copy the following code:
<div class="socialphotos-com-gallery slpht-clearfix" data-uid="shopify-domain.myshopify.com"></div> - Enter the code for your gallery
- Click Save & Close
- Save your changes and publish
- Check it on your website.
Keep your gallery growing
Invite more customers to contribute, review new submissions, and feature photos that show different ways to use your products.