Getting Started on Socialphotos
Introduction
This guide shows you how to collect user-generated content (UGC) and use it to drive sales on your Shopify store using Socialphotos.
Most stores follow the same flow: collect UGC, tag products in that UGC, and embed galleries on product pages and site pages.
The most important concept to understand is how Tag Product works. Once you understand this, most other features will make sense.
At a high level
- Install Socialphotos
- Collect UGC (Instagram, customer uploads, or bulk uploads)
- Embed the UGC Product Gallery on product pages
- Tag products in UGC
- Optionally embed UGC Page Galleries elsewhere on your store
Install Socialphotos from the Shopify App Store
Install Socialphotos from the Shopify App Store. Socialphotos is built specifically for Shopify and uses Shopify’s native app embedding system.
After installing, you’ll be prompted to select a plan. You get 7 days of free trial. You can change or cancel your plan anytime from Settings → Billing inside the Socialphotos app.
Billing is handled through Shopify and appears on your Shopify invoice. Uninstalling the app stops future charges.
Once installed, Socialphotos syncs your products for tagging and your orders so you can track how UGC impacts sales.
Collect UGC from Instagram
Most stores start by connecting Instagram to bring in UGC. This gives you photos and videos to work with right away.
To connect Instagram:
- Your Instagram account must be a Business or Creator account
- Your Instagram account must be connected to a Facebook Page
When connected, Socialphotos can retrieve Instagram content that Instagram allows third-party apps to access, such as posts, reels, and tagged content. Instagram does not allow retroactive access to past mentions or hashtags.
Full details are covered in the Instagram Guide.
You can also skip this step and connect Instagram later from Settings → Instagram.
Other ways to collect UGC
In addition to Instagram, Socialphotos supports:
- Customer uploads: Enable an upload button so visitors can submit photos or videos directly on your site.
- Bulk uploads: Upload your own content, such as existing customer photos or migrated UGC.
All UGC sources behave the same way inside Socialphotos. You can add them to galleries and tag products to make them shoppable.
How Tag Product works (important)
Tagging a product is the key action in Socialphotos. It affects UGC in two ways:
- Product pages: If the UGC Product Gallery is installed on product pages, the tagged UGC will appear on that product’s page.
- Shoppable behavior: Any gallery that contains this UGC becomes shoppable. Shoppers can click the UGC, see the tagged products (for example under “IN THIS LOOK”), and go to the product page to purchase.
This applies regardless of where the UGC comes from: Instagram, customer uploads, or bulk uploads.
Embed UGC Product Gallery on product pages
The UGC Product Gallery is embedded on your product pages. It displays UGC that has been tagged to the product being viewed.
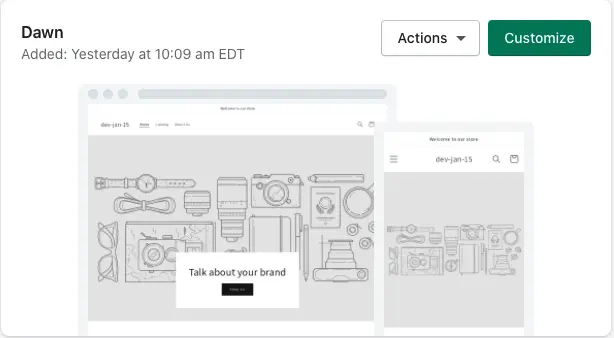
- Go to your Shopify Admin Themes
- Click on Customize to start the Theme Editor
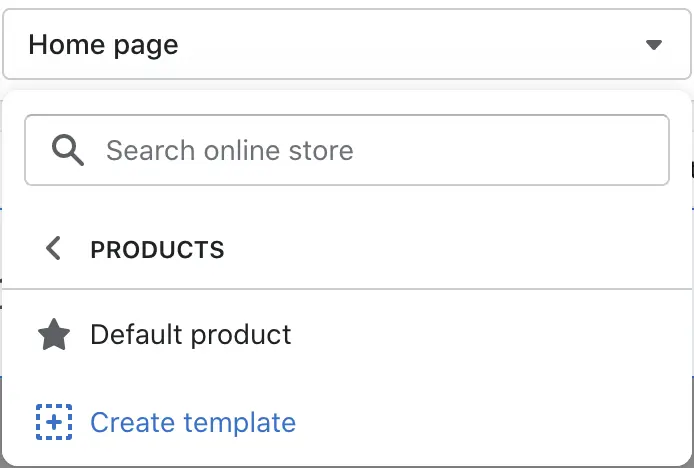
- Click on Home page → Products → Default Product
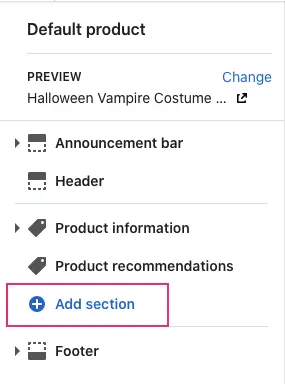
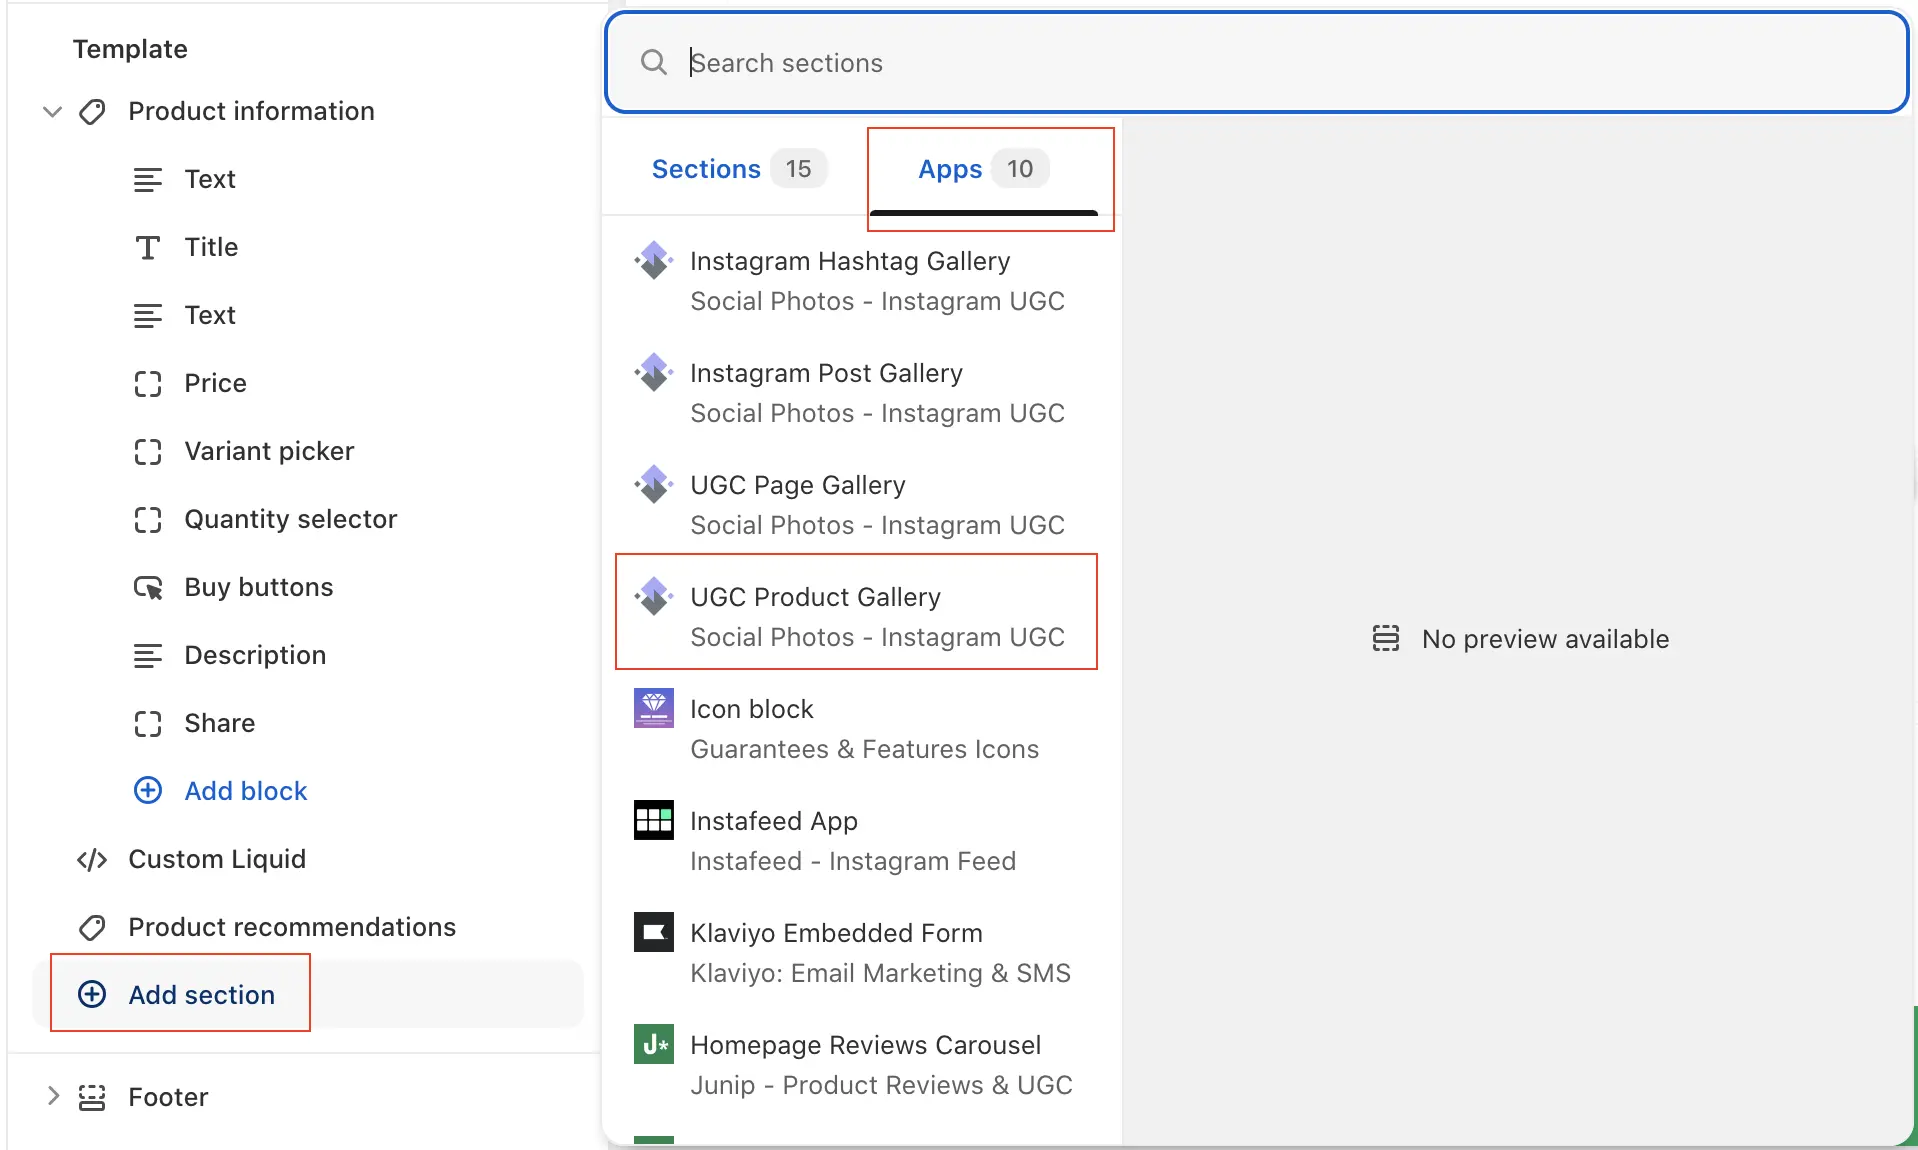
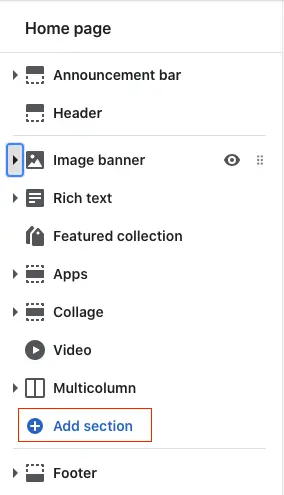
- On the product template's page, scroll down the left navigation until you see Add Section and click on it
- Click on Apps .
- Click on UGC Product Gallery.
- Click Save
- Check it on your website.
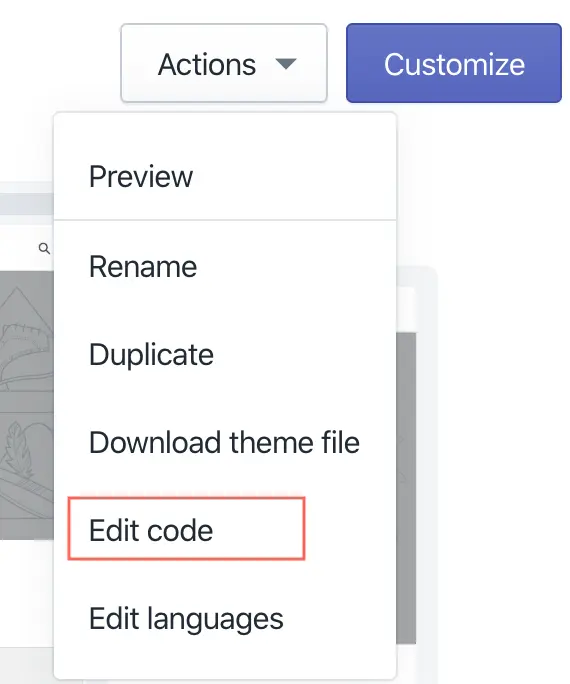
- Go to your Shopify Admin Themes Page.
-
Click on Actions and Edit Code
-
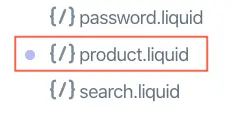
In the Templates section, click on product.liquid
-
Copy the following code:
<div class="socialphotos-com-gallery slpht-clearfix" data-uid="shopify-domain.myshopify.com"></div> -
Paste the code at the bottom of the product.liquid page.

- Click Save
- Check it on your website.
- Start on your Page Builder's theme editor.
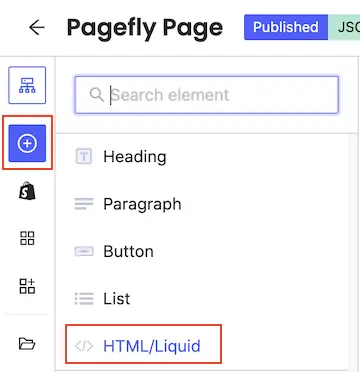
- Click on Add Section and select HTML/Liquid.
- Click Open Code Editor
-
Copy the following code:
<div class="socialphotos-com-gallery slpht-clearfix" data-uid="shopify-domain.myshopify.com"></div> - Enter the code for your gallery
- Click Save & Close
- Save your changes and publish
- Check it on your website.


Show UGC on a product page
To show UGC on a product page, tag it to a product.
Steps
- Find the UGC in the Socialphotos app
- Click Tag Product
- Select the product
- Save
- Refresh the product page
What happens next
The UGC appears on the product page and becomes shoppable wherever it appears.
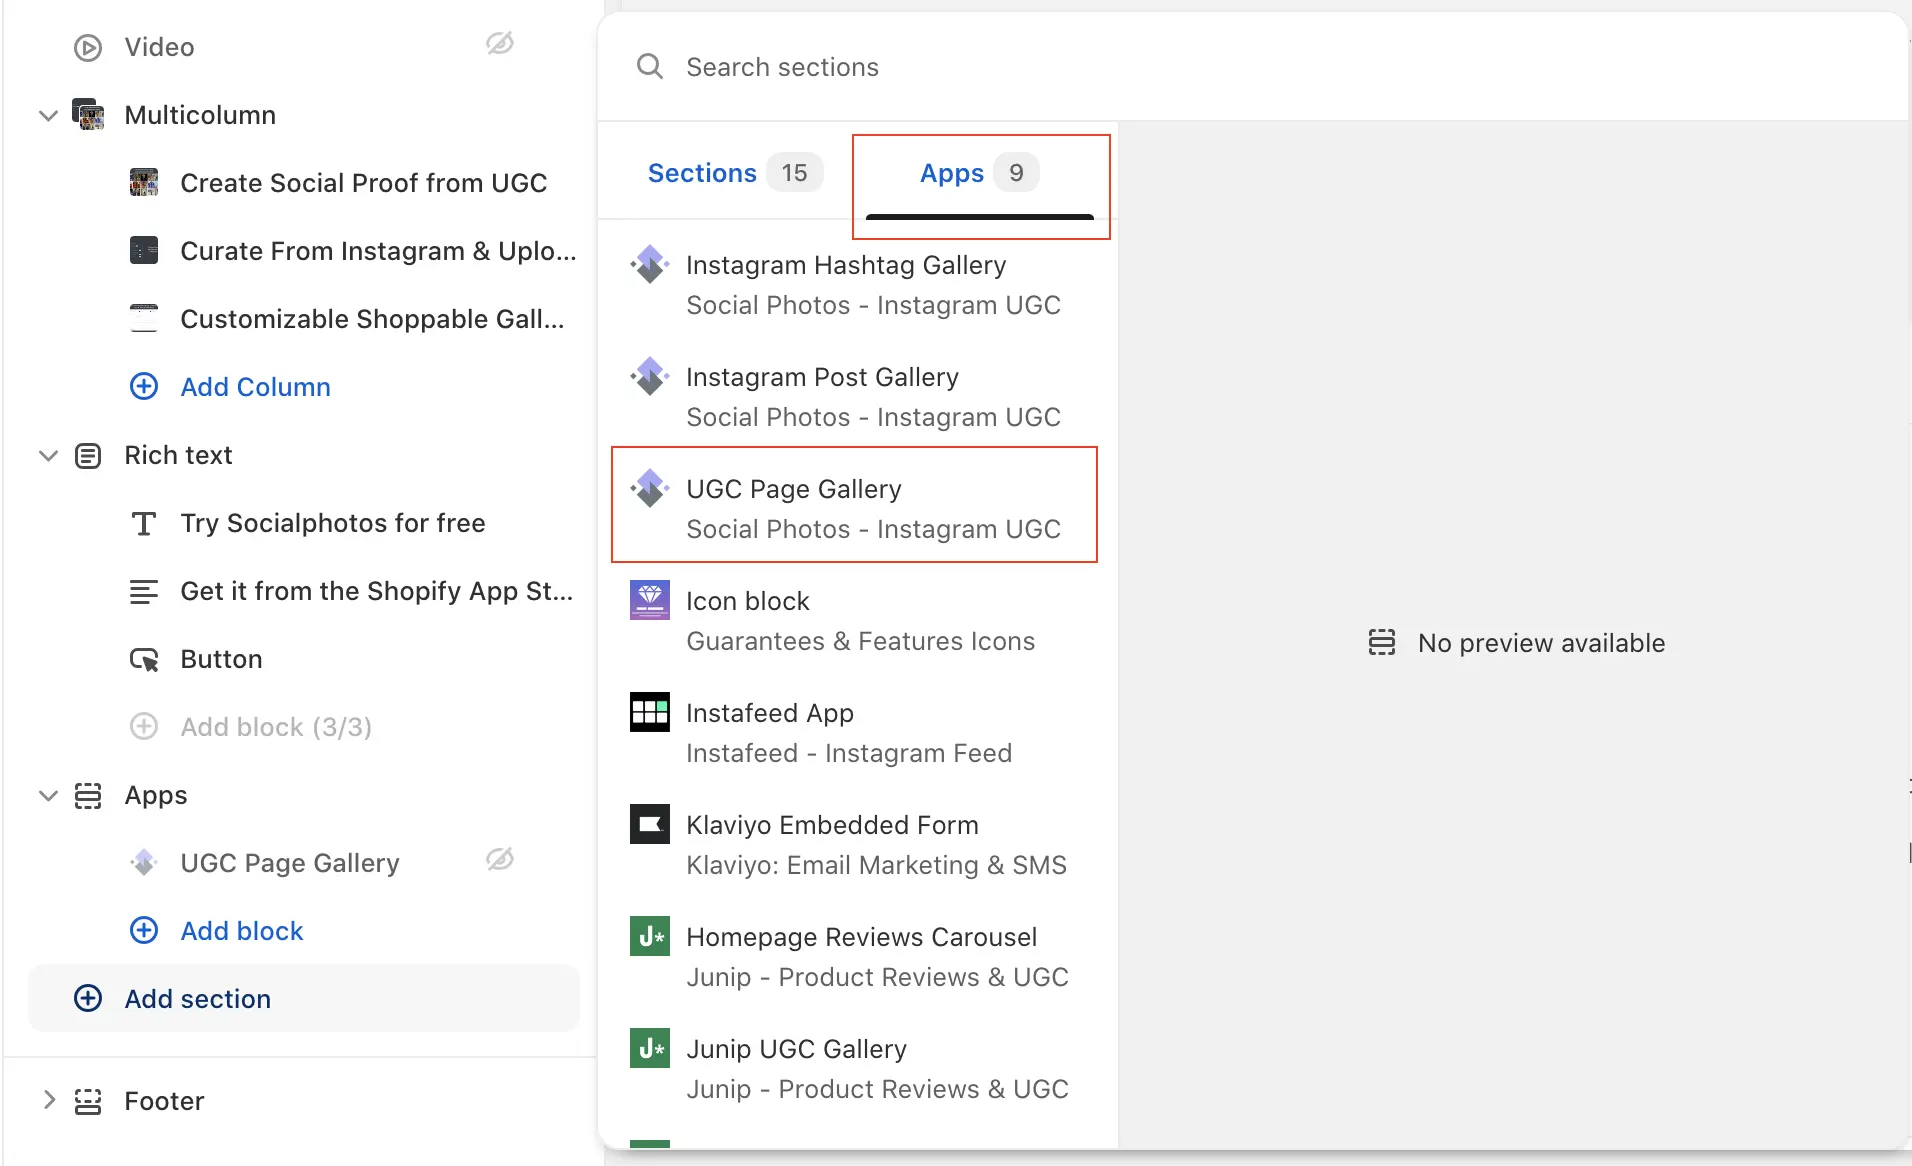
Embed UGC Page Galleries
Page Galleries let you display selected UGC on pages like your homepage, landing pages, or blog posts.
If UGC in a page gallery is tagged with a product, it becomes shoppable automatically.
- Go to your Shopify Admin Themes page
- Click on Customize to start the Theme Editor
- Scroll down until you see the Add Section and click on it
- Click on the Apps tab.
- Click on UGC Page Gallery
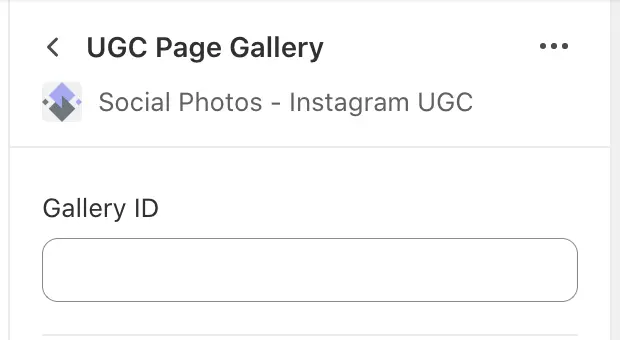
- The UGC Page Gallery is installed, but we need to specify the gallery ID.
- Click on UGC Page Gallery that you have just installed.
- Enter Gallery ID into the Gallery ID field
- Click Save
- Check it on your website.

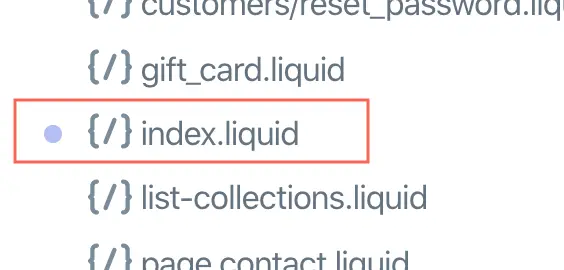
- Go to your Shopify Admin Themes Page.
-
Click on Actions and Edit Code
-
In the Templates section, click on index.liquid
-
Copy the following code:
<div class="socialphotos-com-gallery slpht-clearfix" data-id="Gallery ID"></div> -
Paste the code at the bottom of the index.liquid page.
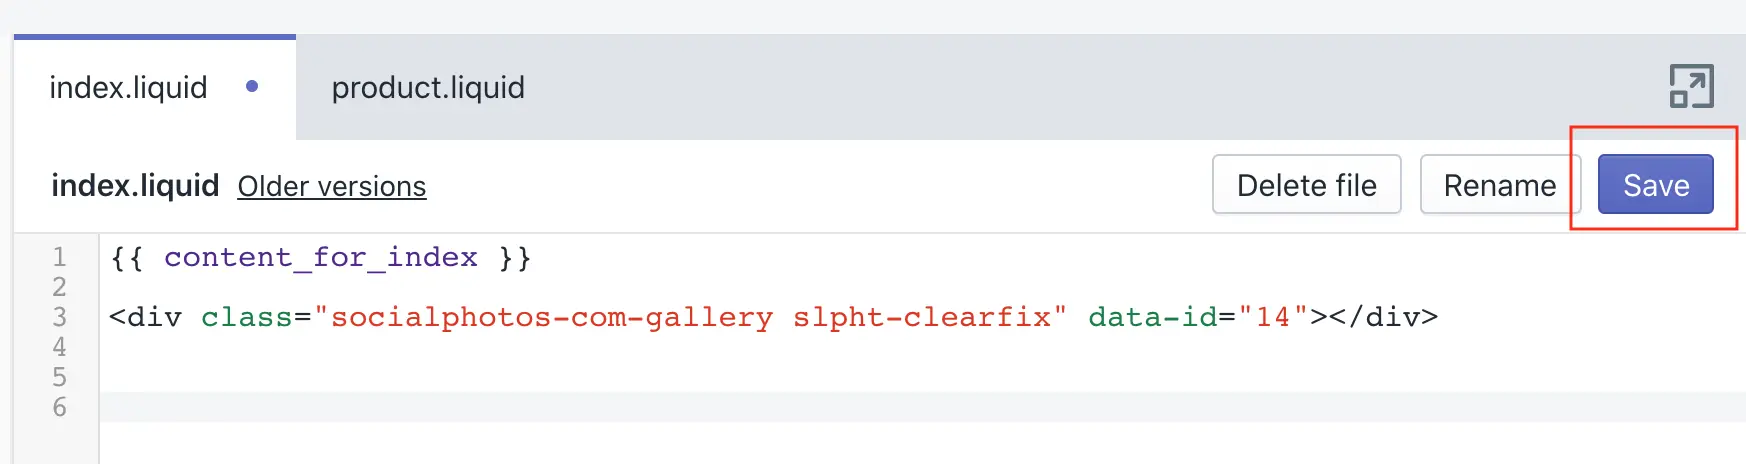
- Click Save
- Check it on your website.
- Start on your Page Builder's theme editor.
- Click on Add Section and select HTML/Liquid.
- Click Open Code Editor
-
Copy the following code:
<div class="socialphotos-com-gallery slpht-clearfix" data-id="Gallery ID"></div> - Enter the code for your gallery
- Click Save & Close
- Save your changes and publish
- Check it on your website.
If you don't see your Page Gallery, contact us for help.