Customer Uploads
Introduction
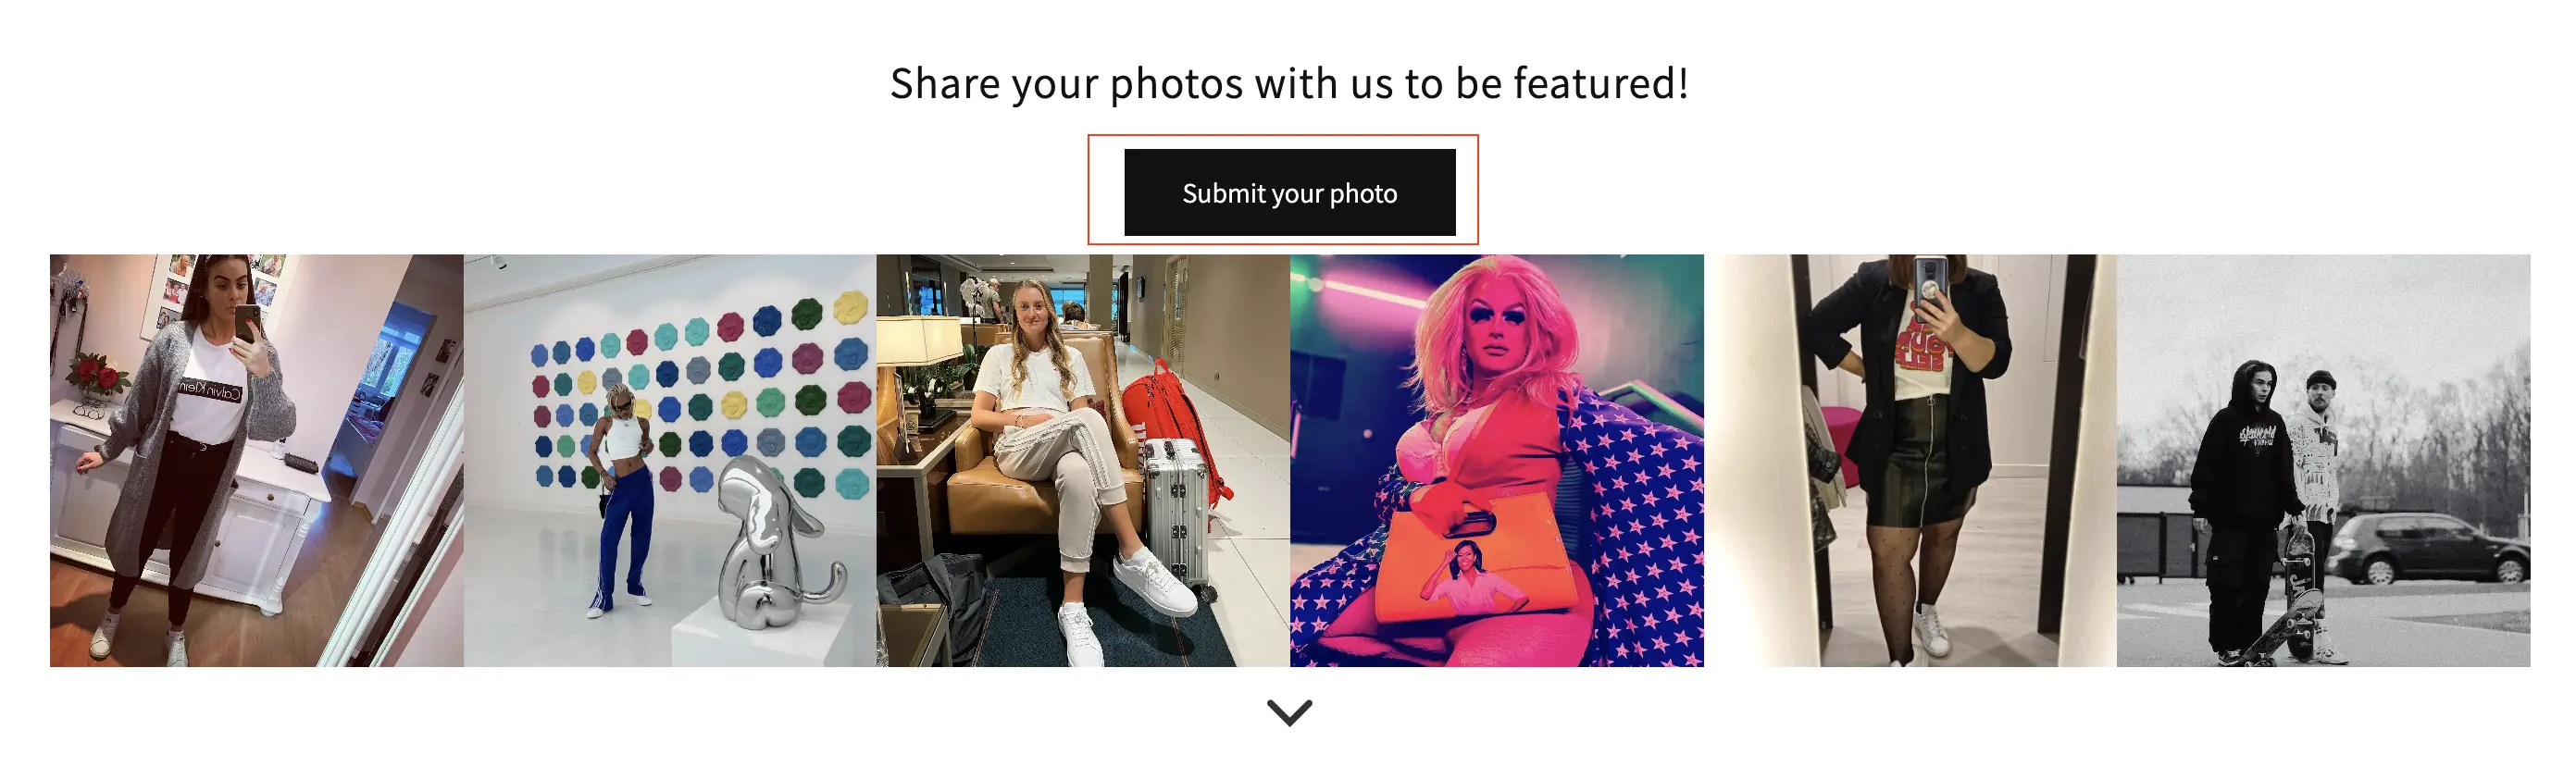
Customer Uploads allow visitors to your Shopify store to submit their own photos or videos, which you can then feature as UGC on your website.
Customer uploads are one of the ways UGC enters Socialphotos. Once uploaded, you decide where that UGC appears by adding it to a gallery or tagging it to a product.
Customer uploads can be displayed on:
- UGC Page Galleries (for homepages, landing pages, blogs, and other pages)
- UGC Product Galleries (to show customer photos on product pages, plan dependent)
How do I get a customer photo to show on my website?
To show a customer upload on your website, you need to add it to a gallery that is embedded on a Shopify page.
Before you start
- Make sure you have a gallery embedded on the page where you want the photo to appear. This can be a UGC Page Gallery or a UGC Product Gallery.
- If you want customers to submit new photos, make sure the gallery has the Upload button enabled.
Steps
- Ask your customer to upload their photo or video using the upload button on your website.
- In the Socialphotos app, go to Customer Uploads and find the new submission.
-
Decide where you want it to appear:
- For a page gallery: click Add To Gallery and select the gallery.
- For a product page: click Tag Product and select the product (plan dependent).
- Refresh the Shopify page to see the gallery update.
What happens next
Once the upload is added to a page gallery or tagged to a product, it will appear on your website wherever that gallery is embedded.
If you prefer to see this in action, the short video below walks through the same steps.
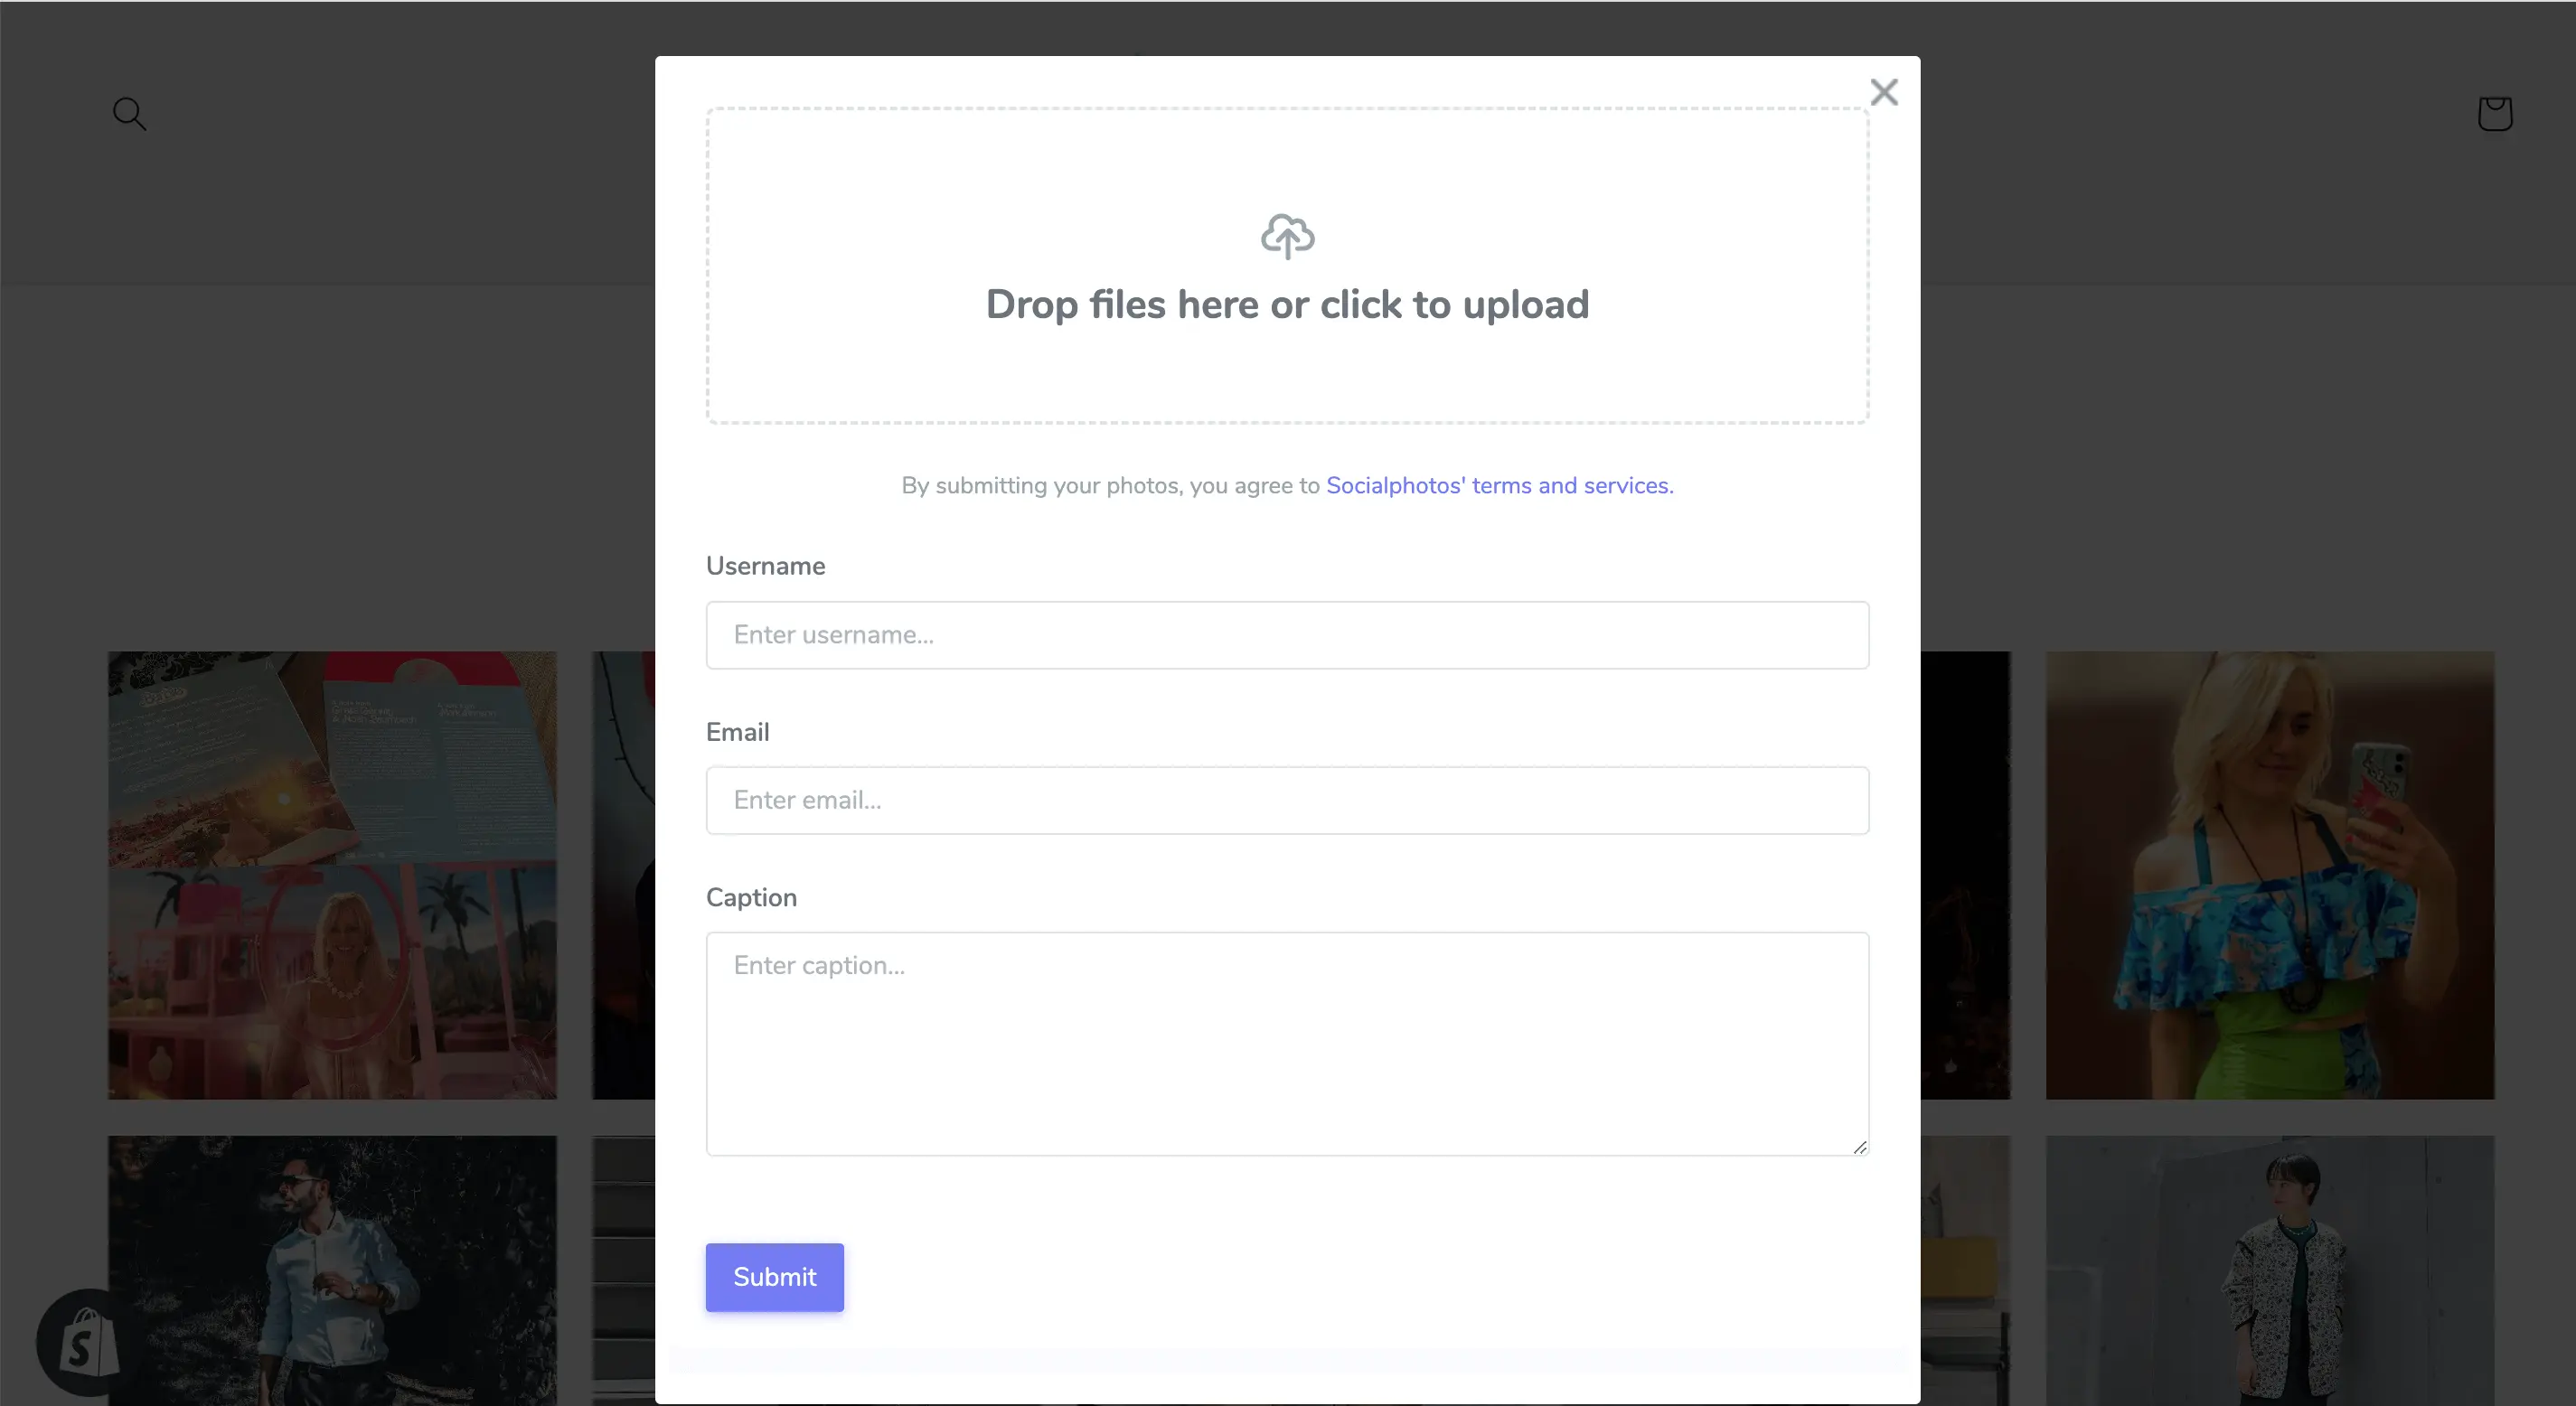
Customer upload form
When a customer clicks the upload button in a gallery, a modal appears allowing them to upload one photo or one video.
Each upload is submitted one file at a time. After submission, the upload is added to your Customer Uploads page for review and placement.
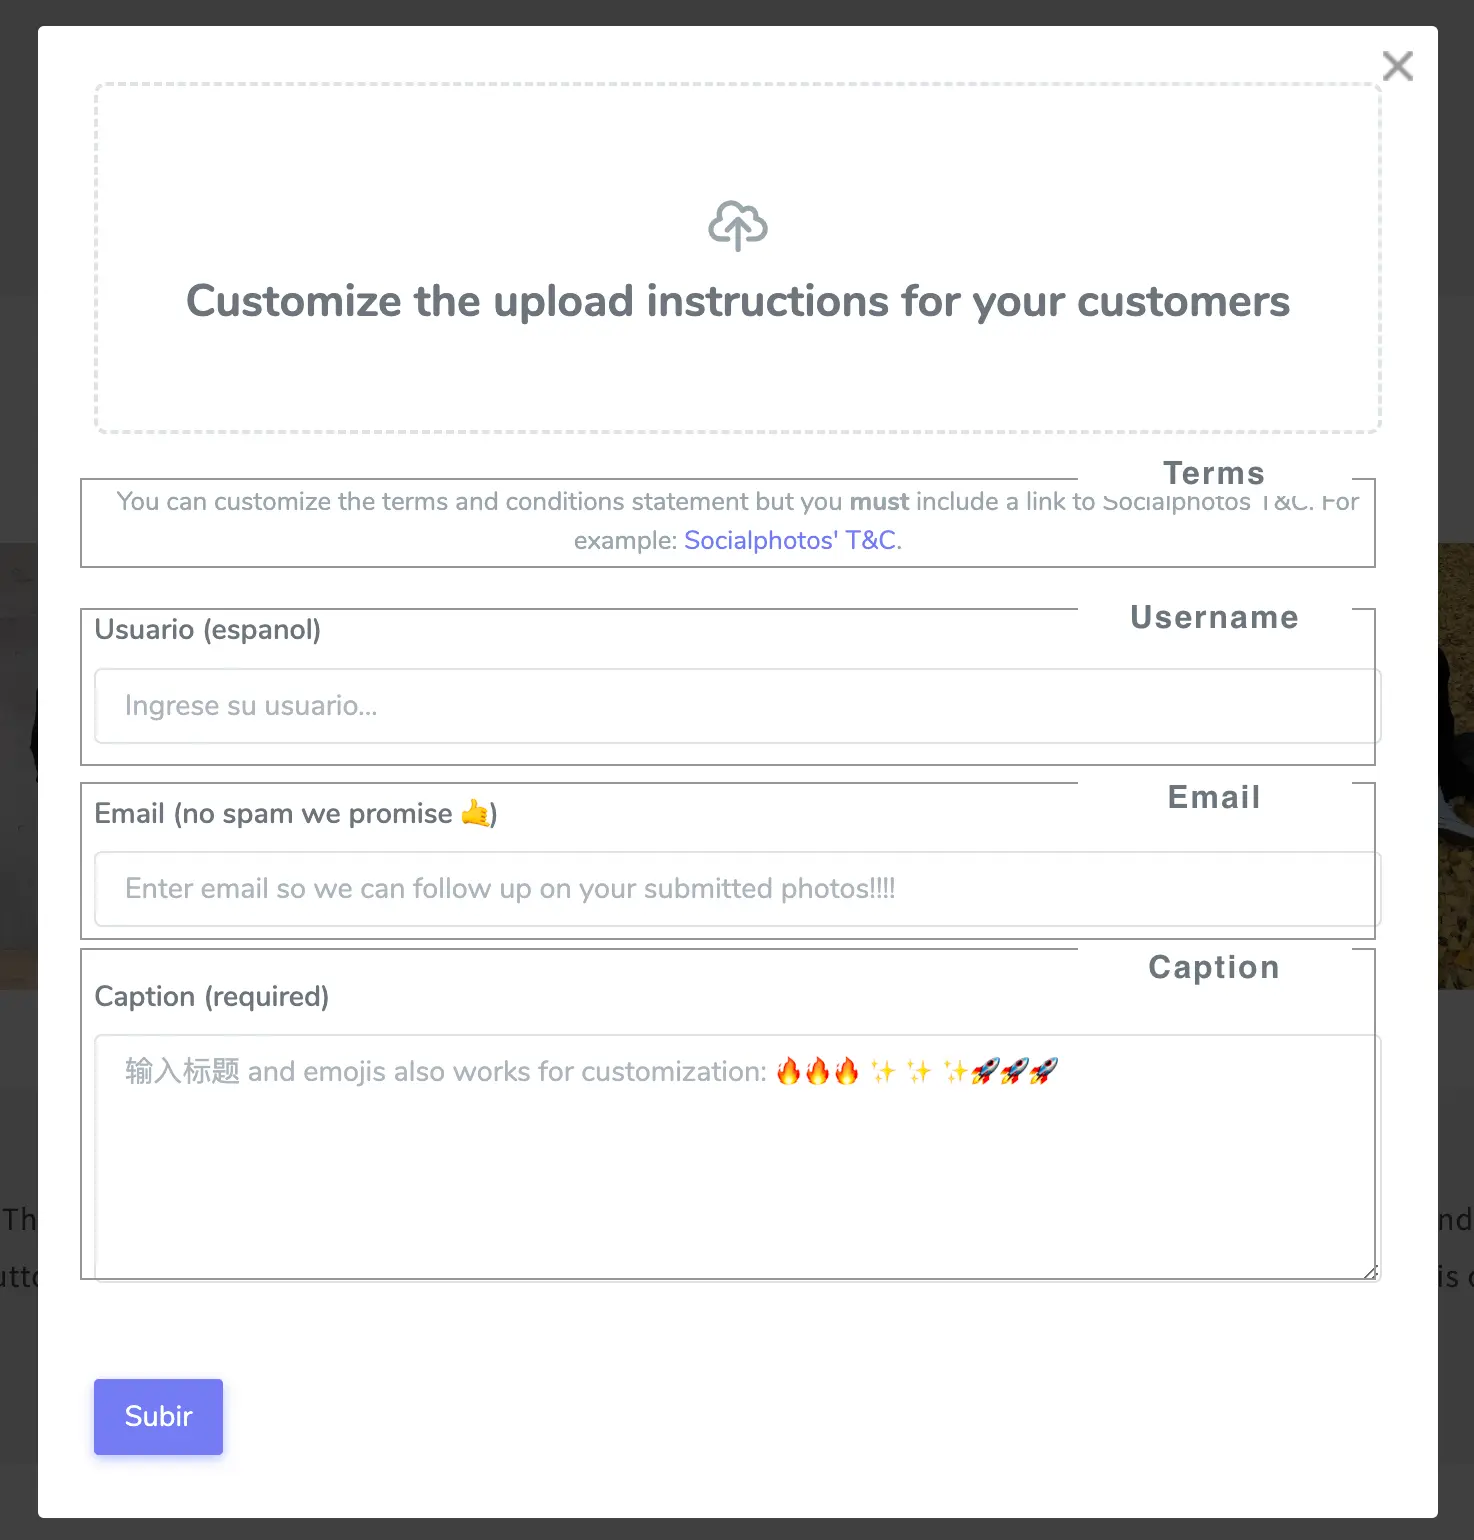
Customize the customer upload form
You can customize the customer upload form so it matches your store and the information you want to collect.
What you can customize
- Show or hide each field (Username, Email, Caption)
- Mark fields as required
- Rename labels and placeholders
- Update the upload instructions
- Customize the terms and conditions text
- Customize the submit button label and success message
Field limitations
At this time, you cannot add new custom fields such as phone number or country. You can only configure the existing fields: Username, Email, and Caption.
Steps
- Go to Customize Gallery.
- Scroll to the Customize Customer Uploads Form section.
- Make your changes.
- Scroll down and click Save.
Export emails
You can export email addresses collected from customer uploads. The export is sent to your email as a CSV file.
Steps
- Go to Customer Uploads.
- Click Export Email.
The exported CSV includes:
- Username
- Date submitted
-
Source, which shows where the upload came from:
- UGC Page Gallery name
- Product name (if uploaded from a product page)
- Instagram Feed gallery
- Instagram Hashtag gallery (subject to Instagram limitations)
The source helps you understand where customers are submitting content from across your store.
Can I download customer uploads?
Yes. Customer uploads belong to you. When customers submit photos or videos through your site, you are free to use and keep that content, subject to the terms you present in your upload form.
Downloading customer uploads
At the moment, Socialphotos does not support downloading all customer uploads in one bulk action.
- You can download customer uploads individually.
- There is no “download all” or bulk export option right now.
Recommended alternative
In most cases, you do not need to download uploads to reuse them. The same customer uploads can be added to multiple galleries inside Socialphotos.
- Open the gallery that already contains the upload.
- Add the same upload to another gallery.
- Embed the new gallery on a different page of your Shopify store.
This allows you to reuse customer uploads across pages without re-uploading or downloading files.