How To Guide
How Socialphotos galleries are embedded
Socialphotos is a Shopify app and follows Shopify’s recommended approach for embedding apps using theme app extensions.
Galleries are added through the Shopify theme editor, just like other modern Shopify apps. Shopify automatically loads the required scripts for you.
You do not need to paste HTML code or load any embed scripts.
All steps below assume you are using a Shopify Online Store 2.0 theme. If you are using an older legacy (Vintage) theme, embedding is still supported but requires manual code changes. See the Vintage Themes guide for details.
Want to see how it looks on a real store? View our live demos .
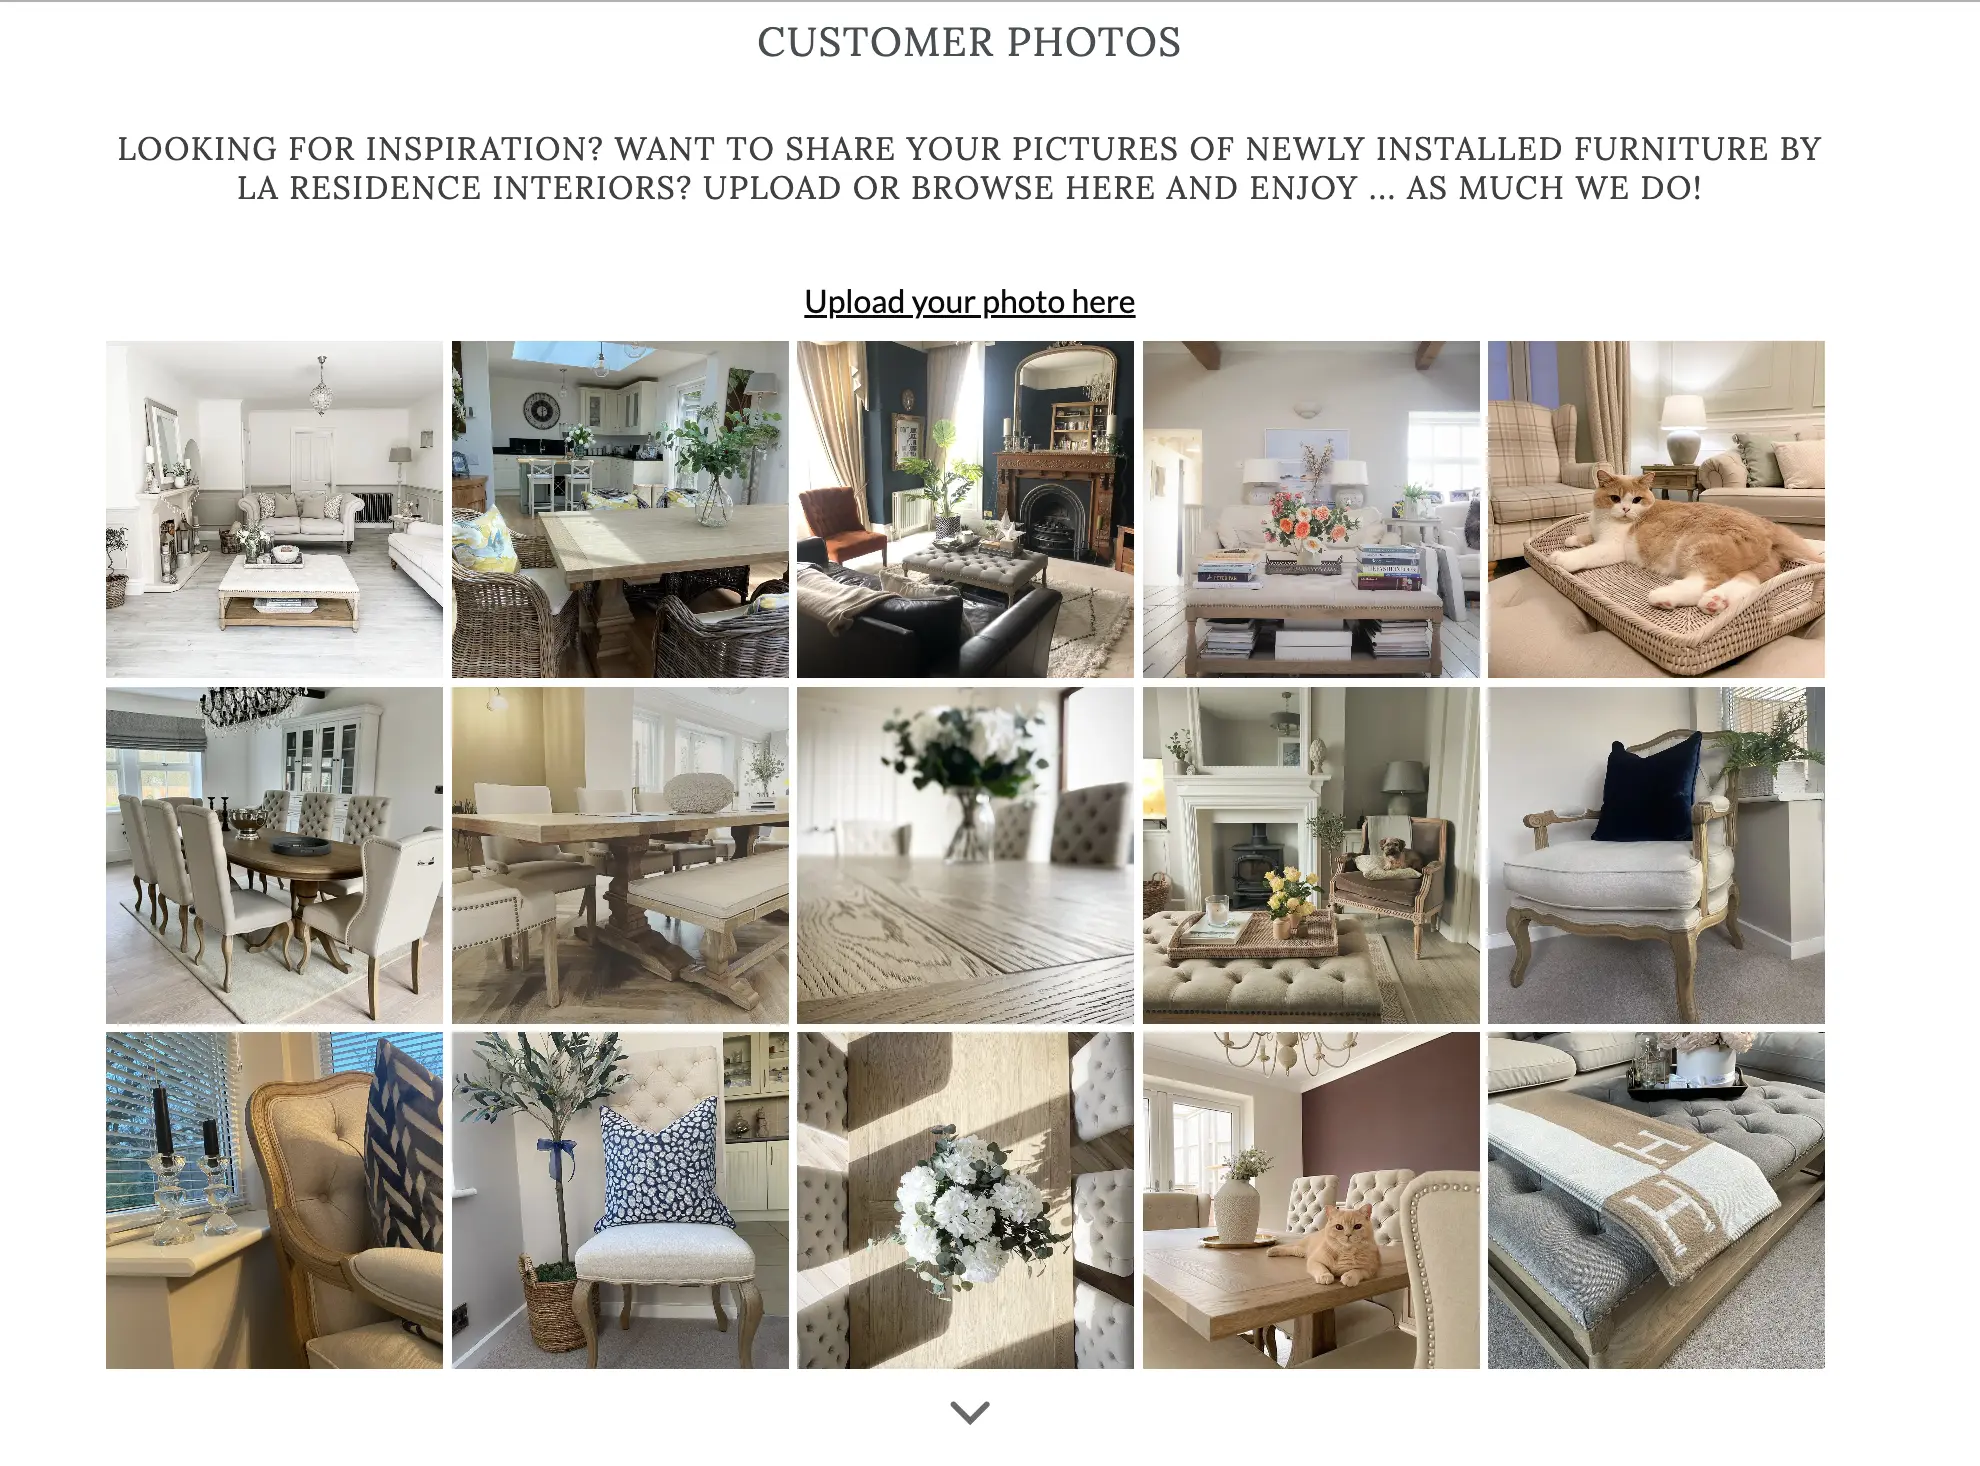
Create a customer photos and videos page
A customer photos and videos page lets you showcase UGC in one place, such as a dedicated social proof or community page. This is usually built with a UGC Page Gallery.
Live examples: UGC Page Gallery (vertical layout) and UGC Page Gallery (horizontal layout) .
Steps
- Go to Shopify admin → Online Store → Themes.
- Click Customize.
- Use the page selector to navigate to the page where you want the gallery to appear. If you do not have a page yet, create one in Online Store → Pages, then return here.
- Click Add block (or Add section, depending on your theme).
- Under Apps, select UGC Page Gallery by Socialphotos.
- Select the gallery you want to display.
- Click Save.
Once saved, the gallery will render automatically on your live storefront.
Add a gallery to a product page
The UGC Product Gallery displays tagged customer content directly on your product pages. This helps build trust at the point of purchase.
Live example: View UGC Product Gallery on a product page .
Steps
- Go to Shopify admin → Online Store → Themes.
- Click Customize.
- Use the page selector to open your Product template.
- Click Add block (or Add section, depending on your theme).
- Under Apps, select UGC Product Gallery by Socialphotos.
- Click Save.
Make sure your UGC has products tagged. Tagged content will automatically appear on the corresponding product page.
Manage UGC: tag products and add to galleries
Socialphotos UGC can come from multiple sources:
- Instagram: feeds, tags, mentions, hashtags, links
- Customer uploads
- Your uploads (bulk uploads)
Open a UGC item
- Go to Favorites → Content.
- Click the UGC item you want to edit.
- The UGC detail page will open. It contains three tabs: Add To Gallery, Tag Product, and Tagged Product.
Remove a product tag from UGC
- Go to Favorites → Content.
- Click the UGC item you want to edit.
- Click the Tagged Product tab.
- Click the trash icon next to the product you want to remove.
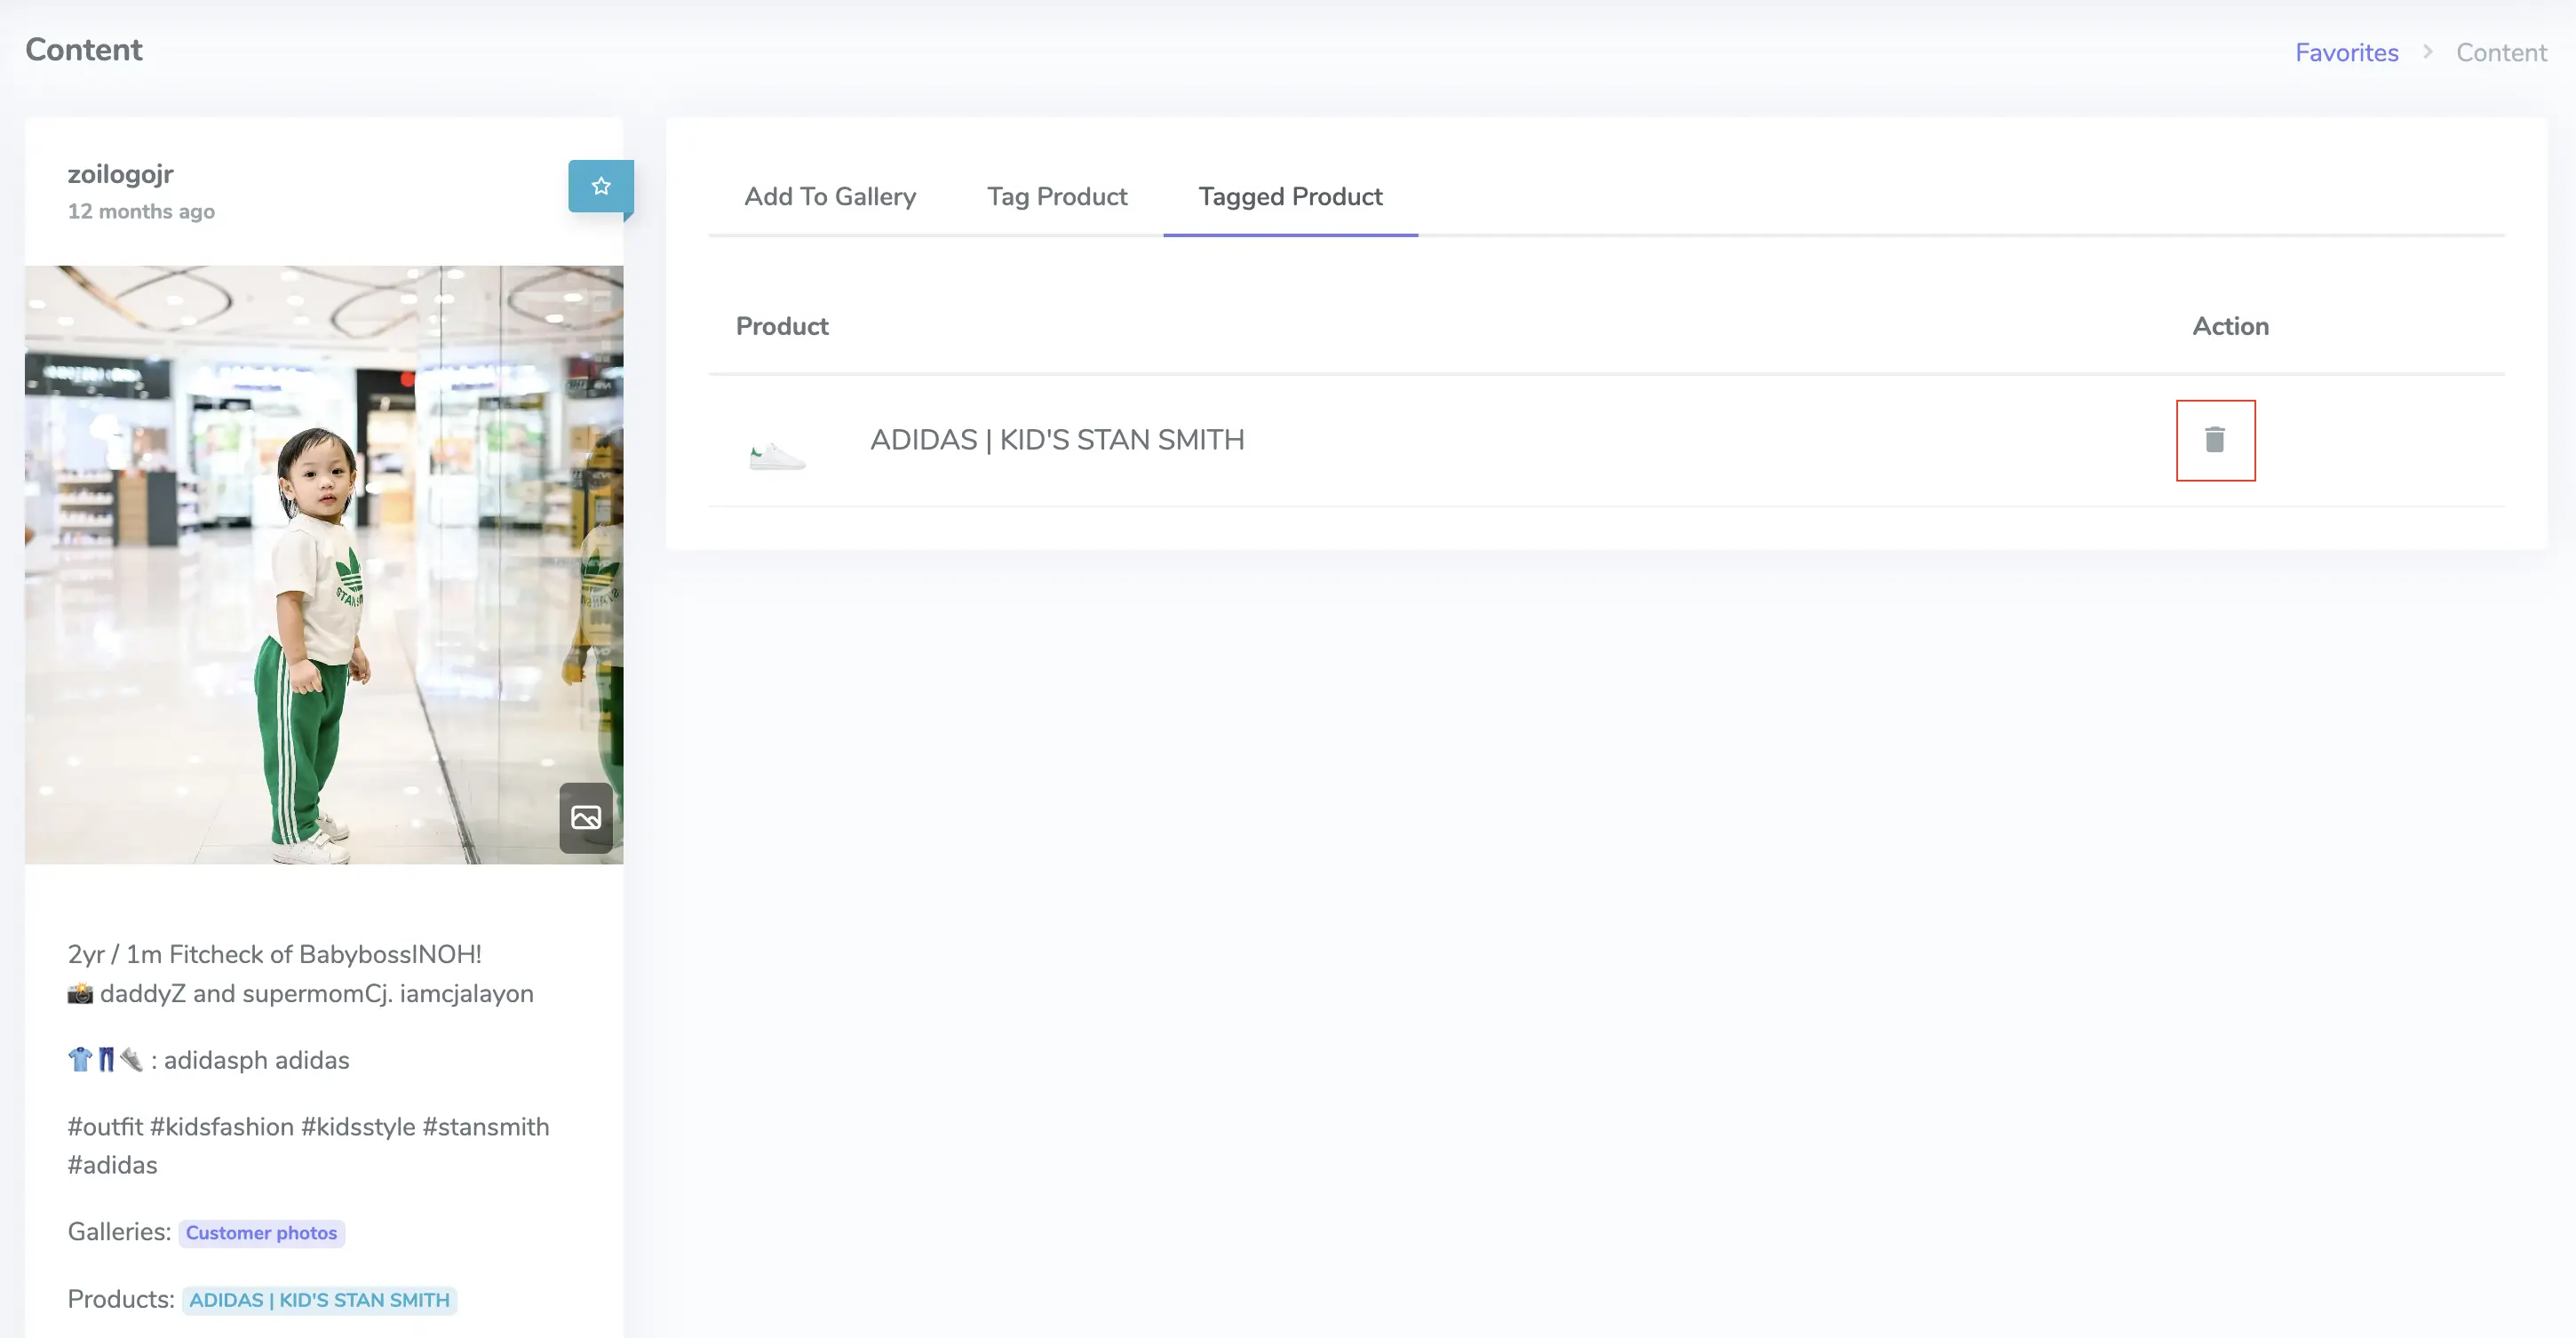
The Tag Product action on the UGC list is for quick tagging only. Removing a product tag must be done from the UGC detail page.
Remove a UGC item from a gallery
- Open the UGC item.
- Click the Add To Gallery tab.
- Find the gallery and click the trash icon to remove the UGC from that gallery.
Tip: Every UGC item that is added to a gallery or tagged to a product appears in Favorites, making it the fastest place to locate and manage your content.
Add a gallery to a blog page
You can add a UGC Page Gallery to blog pages using the same theme editor flow. This is useful for lookbooks, launch posts, and community content.
- Open Online Store → Themes → Customize.
- Use the page selector to choose your blog page or blog template.
- Click Add block (or Add section, depending on your theme).
- Under Apps, select UGC Page Gallery by Socialphotos.
- Select the gallery you want to display.
- Click Save.
The gallery will automatically match the width and layout of your blog.
The gallery is not showing. What should I check?
If a gallery does not appear on your site, check the following:
- The gallery block is added to the correct page or template in the theme editor.
- You clicked Save in the Shopify theme editor.
- The selected gallery contains UGC.
- You are viewing the page on your live storefront, not only the editor preview.
Socialphotos galleries only render inside a Shopify storefront where the app is installed.
Can I embed Socialphotos on a non-Shopify site?
No. Socialphotos galleries only work inside a Shopify storefront where the app is installed.
Shopify automatically loads the required app scripts. Socialphotos does not provide a standalone embed script for external sites such as custom React apps, member portals, Webflow, or other non-Shopify pages.